构建实践
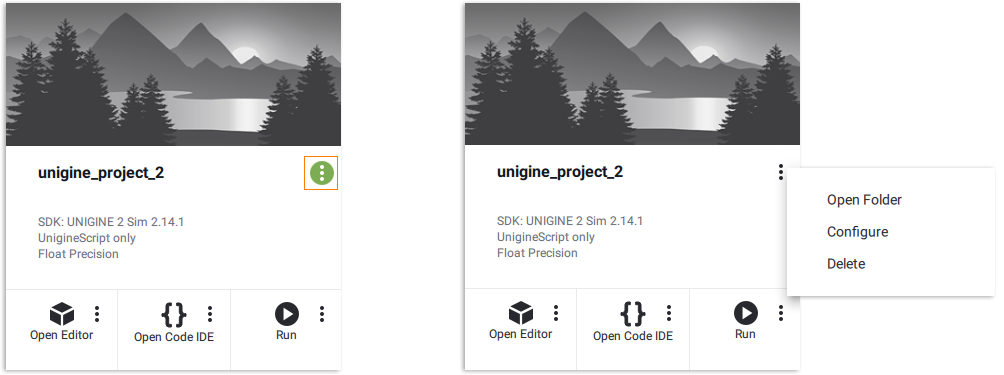
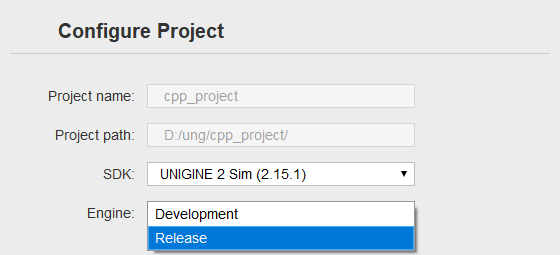
 On the Projects tab of the SDK Browser switch Engine version for the ArchViz project to Release: choose Other Actions → Configure, select Release in the Engine dropdown, and click Update Configuration at the bottom of the configuration window.在SDK浏览器的Projects(项目)选项卡中,将ArchViz项目的引擎版本切换为Release版本:选择Other Actions → Configure(其他操作→配置),在引擎下拉菜单中选择Release,然后点击配置窗口底部的Update Configuration(更新配置)。
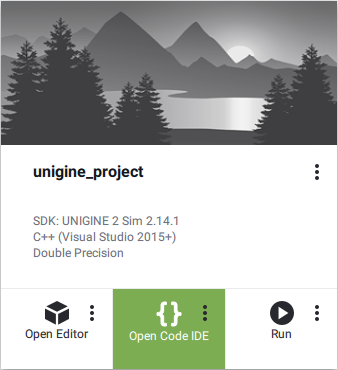
Then open the project in your IDE - choose Open Code IDE on the ArchViz-project's card.然后在你的IDE中打开项目:在ArchViz项目的卡片上选择Open Code IDE(打开代码IDE)。
In the IDE choose the Release build configuration.在IDE中选择Release构建配置。

Build the Release version of the application in your IDE (Build → Build Solution), then continue creating the final build our ArchViz project by doing the following:在IDE中构建应用程序的Release版本(选择Build → Build Solution(生成→生成解决方案)),然后继续通过以下操作创建ArchViz项目的最终构建:
-
Open the project in UnigineEditor. Then choose File → Create Build. The Create Build window will open.在UnigineEditor中打开项目。然后选择File → Create Build(文件→创建构建)。Create Build(创建构建)窗口将打开。
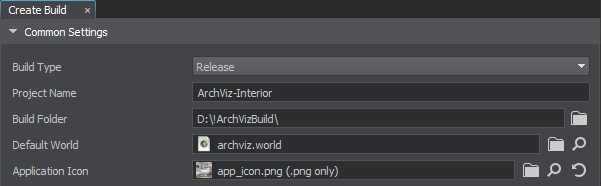
- In the Create Build window select the Release value for the Build Type setting.在Create Build(创建构建)窗口中,为 Build Type(构建类型)设置选择Release值。
- Specify the project name (ArchViz-Interior) and set the output folder in the Build Folder box (this folder must be outside your project folder and must be empty). Make sure that our world (archviz.world) is set as the Default World.指定项目名称:ArchViz-Interior并在Build Folder(构建文件夹)框中设置输出文件夹(此文件夹必须在项目文件夹之外且必须为空)。确保我们的世界(archviz.world)被设置为Default World(默认世界)。
- Drag and drop the app_icon.png asset to the Application Icon box — this will be our application's icon.将app_icon.png资源拖放到Application Icon(应用程序图标)框中,这将是我们应用程序的图标。
-
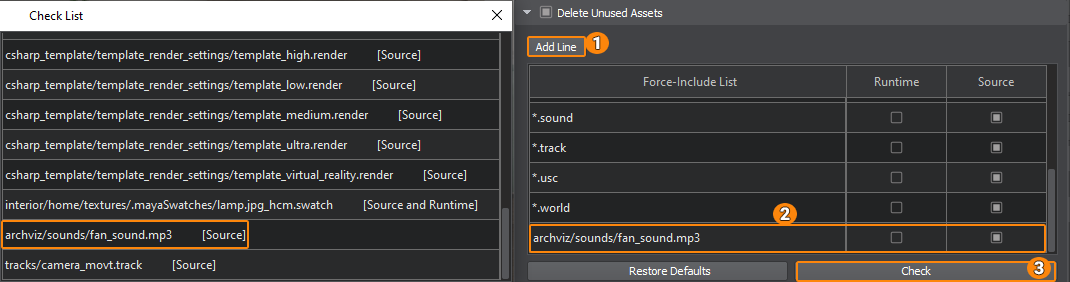
The Delete Unused Assets option by default deletes files that are not referenced by other assets — for example, in our project the fan sound archviz/sounds/fan_sound.mp3 is used only in our code (the Build tool doesn't know this). This is the case when you need to force-include it manually. Click Add Line (1) to add a new line to the list, write the path to the file: archviz/sounds/fan_sound.mp3, and, since the *.mp3 asset has no runtime, check Source (2), then click Check (3) to check if the desired asset is included in the Check List.Delete Unused Assets(删除未使用资源)选项默认会删除未被其他资产引用的文件,例如在我们的项目中,风扇声音archviz/sounds/fan_sound.mp3仅在代码中使用(Build工具不知道这一点)。这时你需要手动强制包含它:点击Add Line(添加行)(1)在列表中添加新行,写入文件路径:archviz/sounds/fan_sound.mp3。由于*.mp3资源没有运行时,勾选Source(源文件)(2),然后点击Check(检查)(3)在Check List(检查列表)中检查所需资源是否被包含。
- You can also include files that are stored outside your project (such as a license text or end-user agreement).你还可以包含存储在项目外部的文件(如许可文本或最终用户协议)。
-
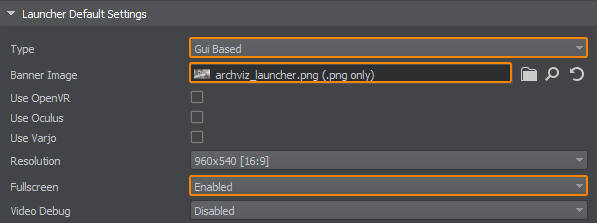
Let's add a launcher module for our application by selecting the GUI-Based type in the Launcher Default Settings group. Drag the archviz_launcher.png asset into the Banner Image box — it will be displayed in the launcher. And enable Full Screen mode.让我们为应用程序添加启动器模块:在Launcher Default Settings(启动器默认设置)组中选择GUI-Based(基于GUI)类型。将archviz_launcher.png资源拖入Banner Image(横幅图像)框,它将显示在启动器中,并启用Full Screen(全屏)模式。
-
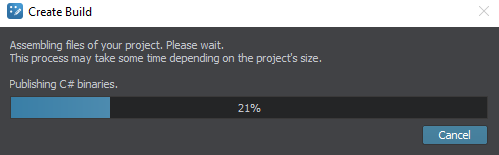
To start the build process, click the green Create Build button at the bottom of the Create Build window. A progress bar will show the current status of the build process.要开始构建过程,点击 Create Build(创建构建)窗口底部的绿色 Create Build(创建构建)按钮。进度条将显示构建过程的当前状态。
-
When the build process is complete, the target folder where the project was built will automatically open. All required files are available, everything unnecessary has been removed.当构建过程完成时,构建项目的目标文件夹将自动打开。所有必需文件都可用,所有不必要的内容都已被删除。

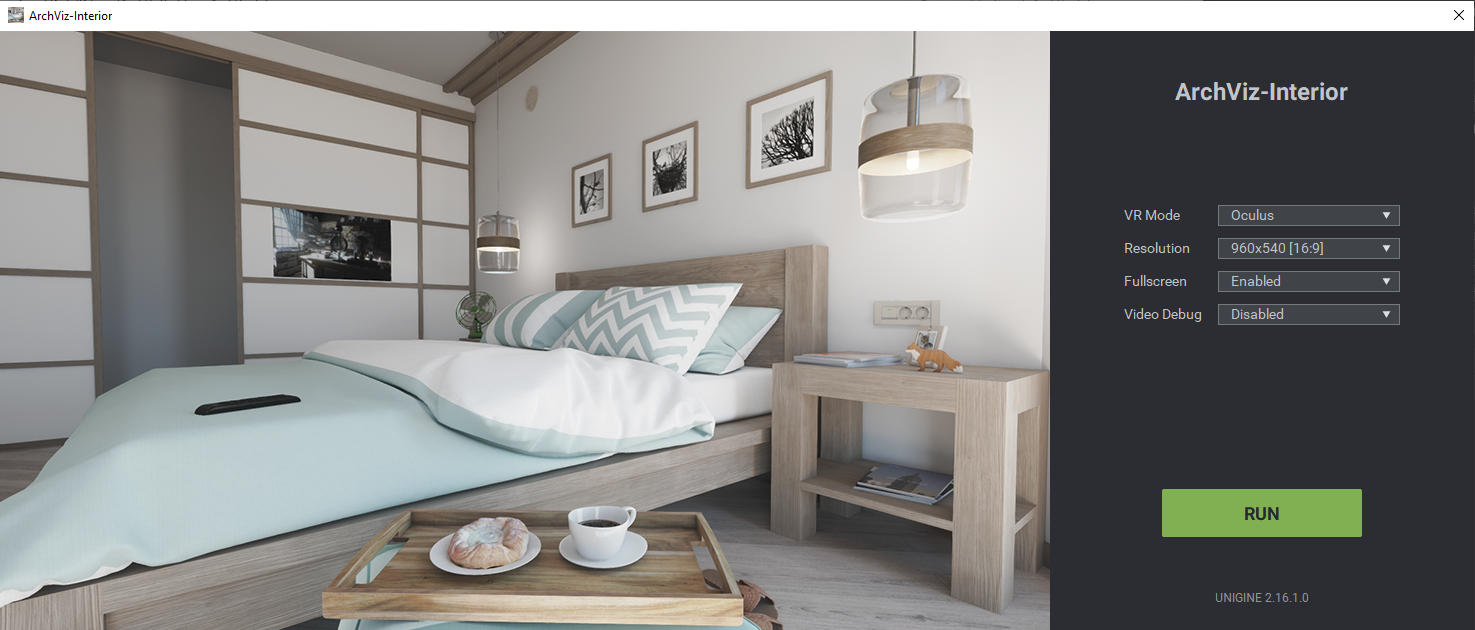
After launching the ArchViz-Interior.exe file, you will see the launcher window, which allows you to run our application with the required settings:启动ArchViz-Interior.exe文件后,你将看到启动器窗口,它允许你使用所需的设置运行我们的应用程序:
Now it's time to celebrate, because your first project with an interactive interior scene is ready! And there's a lot more to come.恭喜你,你的第一个带有交互式室内场景的项目已经完成!还有更多内容即将到来。
本页面上的信息适用于 UNIGINE 2.20 SDK.